
Best practice techniques for facial and beauty analysis.
Numerous studies have been done to investigate the existence and/or relationship of golden ratio proportions in the human face. Surprising few get it right, so the results of many of these studies are inaccurate and misleading. There are four important keys to selecting photographs that are suitable for facial measurements. Next, it is critical to understand and measure the facial markers that commonly reflect golden ratio proportions. In this article I’ll cover these key points, the common mistakes made and the best practices to yield results that are both accurate and meaningful.
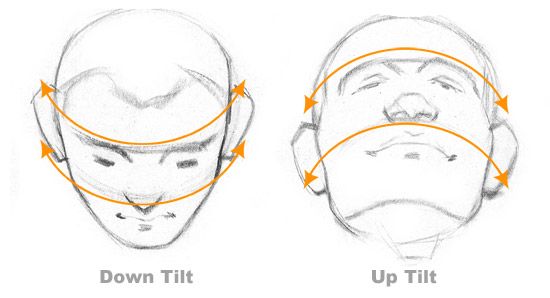
1. Orientation of the head, and eliminating the impacts of perspective.
As simple as it sounds, one of the most important aspects of any image used for facial analysis is that the subject be looking directly into the camera. The front of the face must be parallel to the lens of the camera. There must be no tilt of the head either up, down, left or right. Doing so immediately renders a photo unreliable and usable for any accurate facial measurements.
Click on the image gallery below to see the huge impact that even slight turns of the head can have. It destroys the symmetry of the face. It also changes the relative positions and proportions of facial features in a photo.

Indicators of proper alignment include:
- Yaw (Horizontally) – Both sides of the face appear equal in size. The ears show equally on both sides of the head.
- Pitch (Vertically) – The pupils and iris will be be centered in the eyes, not looking up or down. The chin and nose will appear very square to the camera, not revealing their undersides.
- Roll (Tilt) – A vertical line can be drawn that will pass through the center point between the eyes, the center of the nose and the center line between the front teeth.
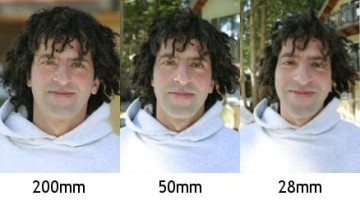
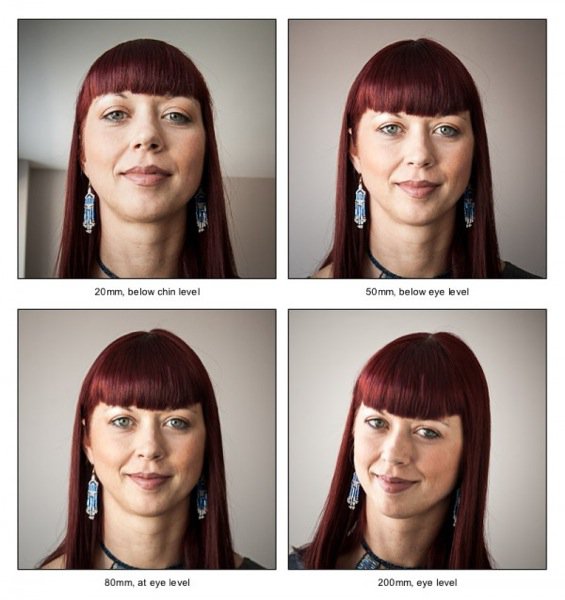
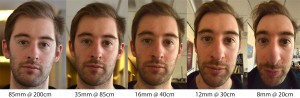
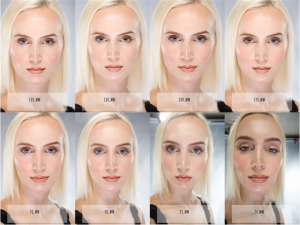
2. Distance from the camera and camera lenses, and eliminating the impacts of optical distortion.
The distance of the subject from the camera is also critical. Photos that are taken too close to the face have varying degrees of fish-eye effects. These create significant distortions in the relative positions and dimensions of facial features.
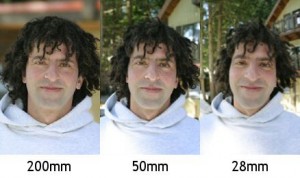
The camera lens also plays an important role. Shorter focal length lenses create more distortion than longer focal length lenses. This is because they try to wrap a larger viewing angle onto the flat surface of the camera’s light sensor, or photographic negative. It’s best to use a lens with a focal length of at least 85 mm. Photos should be taken from a distance of at least 10 feet away from the subject’s face. This immediately disqualifies any selfie photos taken at arm’s length from being usable in any facial analysis study.
Click on the image gallery below to see the impact that different distances and lenses have on facial proportions in photos.
Indications of proper distance and lens selection include:
- The ears will show fully on both sides of the head. The ears will define a clear vertical line that defines the point at which they meet the side of the face.
- The nose will not appear to be large, bulbous, broadened or showing any fish-eye effects.
- Neither the top of the head or the chin will not appear as unusually pointed.
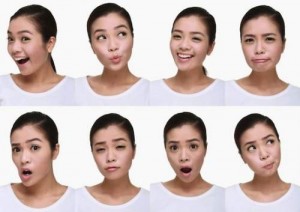
3. Facial expressions and impacts on facial proportions.
The human face is incredibly expressive, and is capable of showing a wide range of emotions. Facial expressions can have a significant impact on the positions, dimensions and proportions of our facial features. Consider the impacts that the following have on facial measurements:
- Opening the mouth widely, on the height of the head.
- Raising of the eyebrows, on the proportion of the forehead and even on the position of the tip of the nose.
- Puckering of the lips, both in their increased height and narrowed width of the mouth.
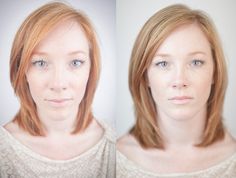
The following photos illustrate the combined incredible impact of facial expressions and head orientation on facial proportions:

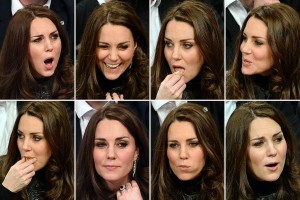
As you can see, it is be impossible to take a set of facial measurements for analysis unless there is a consistent standard. For these reason, any photo used for facial analysis must follow these guidelines:
- The teeth should be closed to gently touch in a natural, relaxed position.
- The eyes should be open, relaxed and focused directly on the camera lens.
- The mouth should be in one of two positions:
- Reposed – Closed and relaxed, with no smile at all.
- Smiling – With a broad, natural smile that is the same on both sides of the face, and that exposes the teeth.
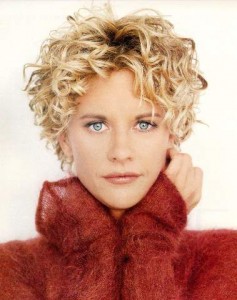
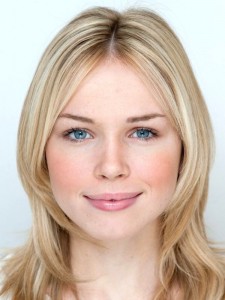
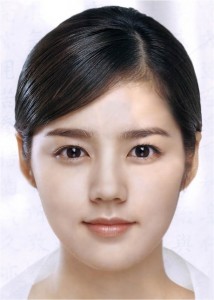
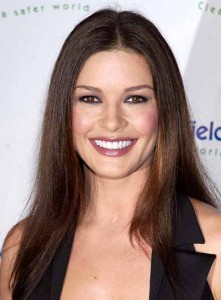
Examples of facial portrait photos that have these characteristics are shown below. Photos like these are often used by modeling agencies and referred to as “headshots.”

4. Image quality and eliminating adverse impacts on accuracy.
Even with excellent results in the first two criteria, it’s critical that the image itself be of high quality so that all key facial markers are clear and easy to measure.
- Resolution – The image should be of high enough resolution. The dimension of the head in the image should be at least 400 pixels tall.
- Clarity – The image should be focused clearly. The key facial markers should have clear lines and borders.
- Lighting – The lighting should be evenly distributed to eliminate any shadows and avoid any washout of facial features. The edges of facial markers should be easy to distinguish.
5. Identifying the key facial markers and calculating the most relevant measurements.
A good facial image that meets the first four criteria is still of little value if you don’t know which points on the face to measure to get a meaningful analysis. There are many dozens of potential points on a face to take a measurement. This then creates hundreds of ratios that can be calculated between these various points. This alone is the downfall in a number of studies of the human face performed by qualified, intelligent researchers at reputable academic institutions. As an example, see my reviews of the 2009 study on facial ratios at two universities and another article interviewing another Ph.D. Both studies claimed there to be no golden ratios at all in the face.
The video below illustrates how facial markers and dimensions are measured to identify common golden ratio. See the related article on the markers used in this facial beauty analysis.
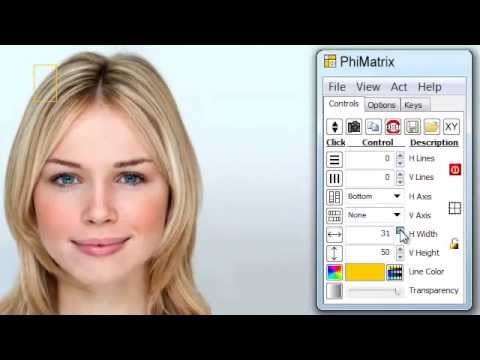
The image analysis shown in the video was done with
PhiMatrix Golden Ratio Design and Analysis Software


Most faces regarded as beautiful will have a significant number of key facial proportions that are at, or very close to, the golden ratio. All faces are unique though and have individual variations and imperfections. So not every face has all these proportions, even beautiful ones.
These particular markers have been developed through analysis of many faces. They are based on a very simple and logical set of the points that are required to construct the basic features of a human face. They will be discussed in detail in an upcoming article
Conclusion
By following the guidelines above, you should be able to take or select photos suitable for accurate facial analysis and identify a number of golden ratio dimensions in many faces. I’d love to see the results of your analysis. See the Contact page to send some samples. You can find additional discussion and examples of golden ratio facial analysis in the Beauty section of this site.
References:
Using Facial View and Camera Angle to take Flattering Portraits by Darlene Hildebrandt
How to draw the human head from Draw as a Maniac
Lens Perspective Tutorial by Stephanie Eastwood
Fautograph Analysis on Proboards.com